
No room is complete without art on the walls. Artwork is the cherry on top, the frosting on the cake, the accessories to the perfect outfit - it is the finishing touch that pushes your space from beautiful to stunning.
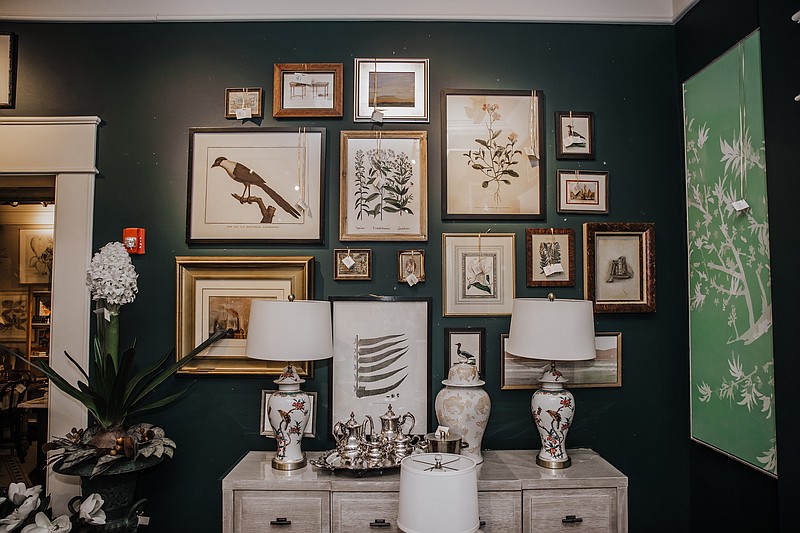
A few weeks ago, I posted a photo that featured a lovely gallery wall display curated and hung by our very own talented art (and chandelier, and really anything that requires hanging ) specialist, Dillon. Dillon has been with the shop for 23 years and has his art arrangements down to a science - so precise it seems like magic. He has traveled from coast to coast on behalf of Nell Hill's, hanging art for customers from Palm Springs to Washington, D.C., and is always in high demand.
This is why, when I started receiving some questions on how to create the perfect display, I knew I needed to corner him and get the inside tricks and tips that he has collected over the years to share with you all.
Step One: Grouping your art. When pulling pieces for a gallery wall there are many ways to mix and match. While Dillon sometimes likes to pick a theme for a grouping, the most important part of a collection is to have variety. This means different sizes, shapes, mediums, and subjects are all welcome in a grouping. Having a diverse collection of items makes for an interesting display that encourages the eye to explore. When Dillon is finished pulling art for a display, he sorts them into piles based on size and frame color which makes for an organized way to start creating your layout.
Step Two: The Layout. Once you pull the art with which you are working, it's time to layout your vision. Instead of going straight to the wall with hammer in hand, we recommend a floor layout first. When Dillon has the time (and space) he lays out his pieces on the ground in front of his chosen wall starting with the visually heaviest pieces.
The heaviest pieces are going to be the largest sized or those with dark, bold frames and colors. By beginning with these pieces, you can ensure that they are spread evenly throughout your display to create visual anchors that draw the eye from side to side. Grouping too many of the heavy pieces together can create an unbalanced and lopsided display. Add in medium sized pieces and fill in with the smallest among your grouping to complete your gallery.
While your display is on the ground and you have it looking just right, mark the middle of the display and take a picture on your phone. This way, once you start moving things around you have something to reference for spacing and placement.
Step Three: Spacing and Measurement. First things first: Identify where you want the middle of your display to fall on the wall and mark it. The easiest way to place an arrangement is to place the middle first and work around it. Dillon then uses a Post-It note system where he writes the dimensions of the paintings on two Post-It notes and places them at the top and bottom of where he wants the piece to be placed. That way he knows how large the art is and can see where it will fall on the wall.
The Post-It notes make for easy adjustments without marking up your walls (blue painter's tape works just as well if you want to create the entire frame). Once the middle is identified, Dillon places the visual anchors and larger pieces first to create the dimensions of his gallery wall and fills in the spaces with his smaller and lighter options. Et voila! You have a show-stopping gallery wall of your very own!
While there are many other nuanced approaches to curating and hanging a gallery display, I hope that this simplified breakdown is helpful in getting beginners comfortable with the art of hanging art.